When you click the Preferences ... option, the Reading Window Preferences dialog appears.
You can specify these Reading window preferences:
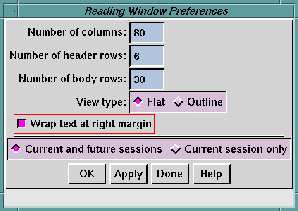
You can control whether all the message headers or only a specific subset of message headers are shown in the headers area (see Show All Headers Option). You can also define which headers are in the subset shown using the Main window (see Displayed Headers Option.
You can set the default type here, or override the default on a per message basis by clicking the View type: radio buttons in the Reading window.
In Outline form you can easily see the message structure, including nesting of parts, if any. Each part is labelled with a description of its contents. You can click on any of the parts and see it expanded.
If you choose Flat form to view a message all the plain text and enriched text parts are expanded, or flattened. The overall structure of the message will not be as apparent, instead it will read like a document rather than its table of contents.
In the Flat view, message parts containing data other than text will appear as icons. The icon will represent the data type, and will be labeled with a short description of the data. Just as with the Outline view, click an icon and the appropriate view program will be launched.
Apply or cancel your changes using the row of buttons across the bottom of the window. See Applying Your Changes.